Loosen the U-shaped bracket nuts, disconnect water lines, remove mounting nut, lift faucet out.
I’ve removed dozens of sinks and faucets in homes and rentals, and I’ll walk you through how to remove kitchen faucet with U shaped bracket safely and efficiently. This guide breaks the job into simple steps, lists the tools you need, covers common problems, and shares hands-on tips I learned on the job. Read on and you’ll have the confidence to remove that faucet without stress or surprise leaks.

Why faucets use a U shaped bracket
A U shaped bracket, sometimes called a mounting strap or support bracket, clamps the faucet to the sink from underneath. It spreads pressure across a wider area than a single nut, which helps stabilize heavy faucets and keeps them from rocking. Knowing how to remove kitchen faucet with U shaped bracket helps when replacing old fixtures or repairing leaks under the sink.

Tools and materials you’ll need
Before you begin, gather everything so you do the job once and cleanly.
- Adjustable wrench (or basin wrench for tight spaces)
- Channel-lock pliers
- Screwdriver set (flat and Phillips)
- Bucket or towel to catch water
- Flashlight or headlamp
- Penetrating oil (for stuck nuts)
- Putty knife (to cut old plumber’s putty if needed)
- Tape (masking or plumber’s tape) and rag
- Safety glasses and gloves
Safety tips before you start
Turn off the water supply to the sink at the shutoff valves. If there are no local shutoffs, turn off the main water supply for the house. Place a bucket under the P-trap and loosen connections carefully to drain residual water. Wear eye protection and gloves when working under the sink; pipes and brackets can be sharp or rusty.

Step-by-step: How To Remove Kitchen Faucet With U Shaped Bracket
These steps assume a typical single- or double-hole faucet anchored with a U shaped bracket. Keep sentences short and follow each step fully.
- Prepare the workspace
- Clear out cabinet contents and put a towel on the cabinet floor.
- Place a bucket under the P-trap to catch water.
- Shut off water and relieve pressure
- Close the hot and cold shutoff valves under the sink.
- Turn the faucet on briefly to drain lines, then off.
- Disconnect supply lines
- Use an adjustable wrench to loosen the nuts on the supply lines.
- If supply lines are old or fused, cut them and plan to replace them.
- Remove the sprayer or auxiliary lines
- If your faucet has a sprayer hose, feed it back through the sink and disconnect where it joins the faucet body.
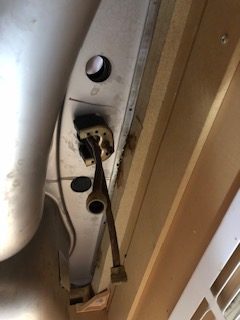
- Access the U shaped bracket
- Slide your head and flashlight under the sink to locate the U shaped bracket that holds the faucet.
- The bracket typically clamps the faucet tailpiece and is secured with one or two nuts or screws.
- Loosen mounting hardware
- Apply penetrating oil to any rusty nuts and let it sit a few minutes.
- Use a basin wrench or adjustable wrench to loosen the nuts that compress the U shaped bracket.
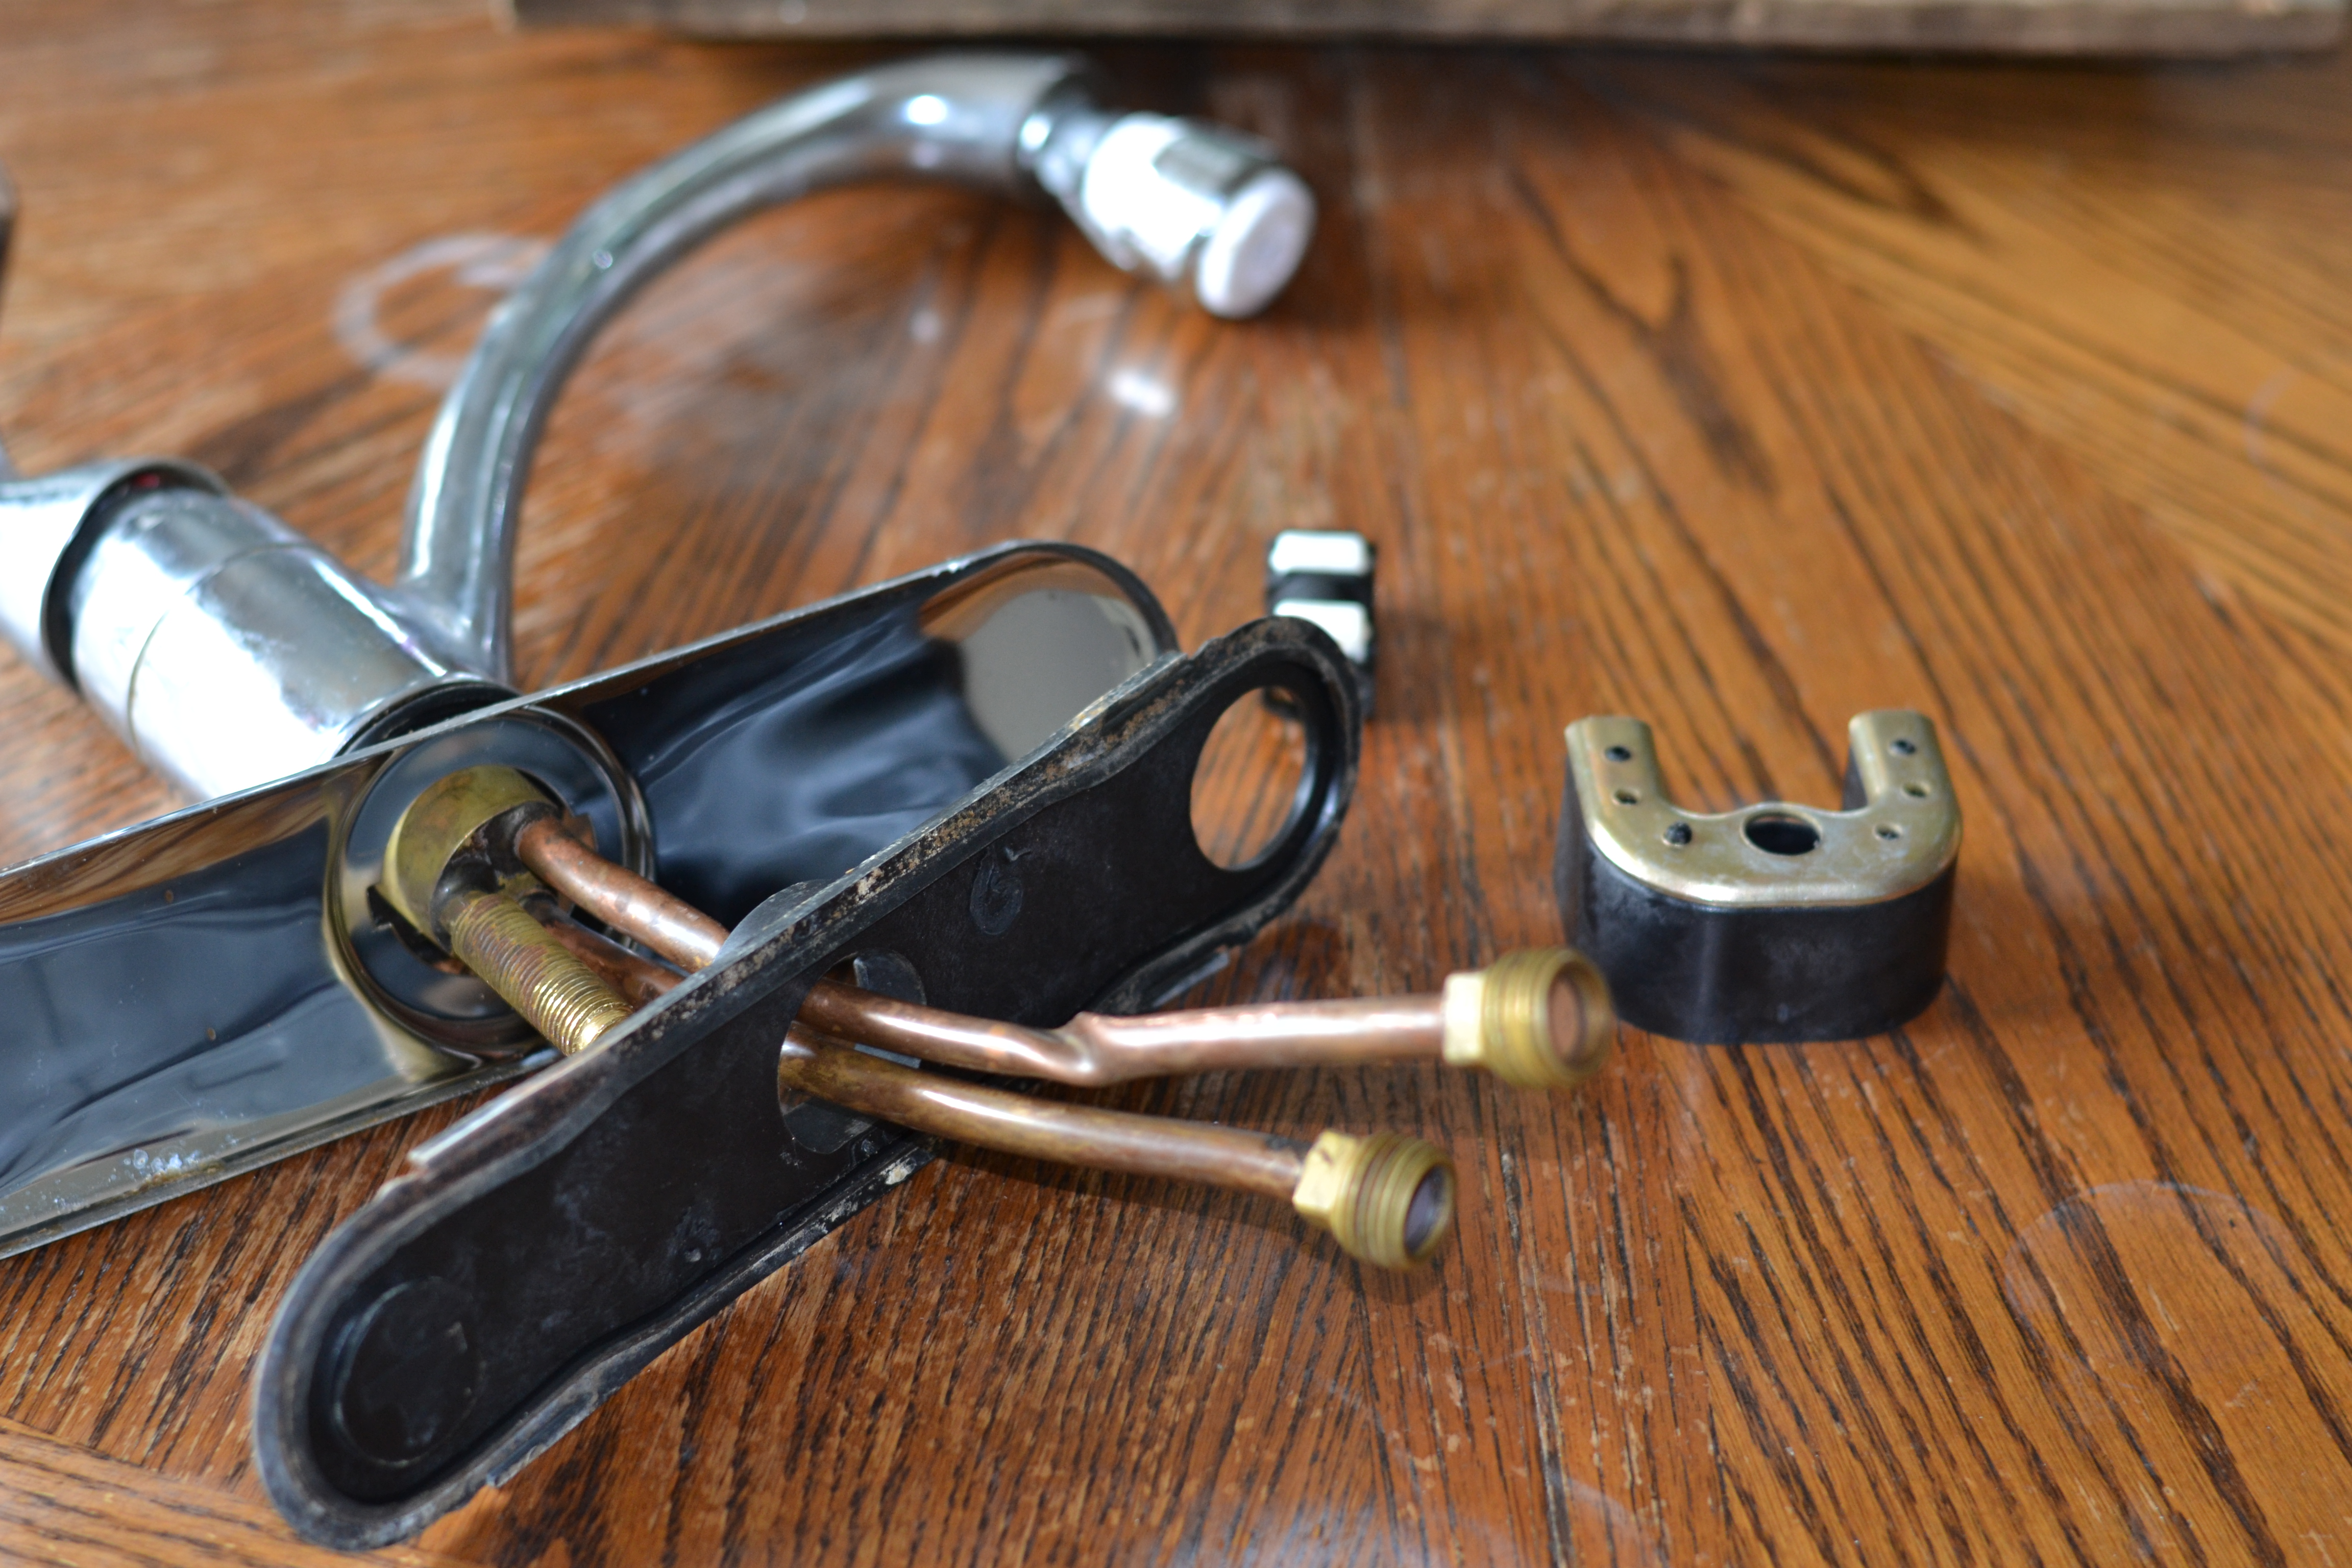
- Remove the U shaped bracket
- Once nuts are loose, slide or unfasten the U shaped bracket away from the faucet tailpiece.
- Keep parts organized for reuse or replacement.
- Lift the faucet out
- From above the sink, lift the faucet straight up while feeding any remaining hoses through the hole.
- If the faucet is stuck to sealant or putty, gently pry with a putty knife.
- Inspect and clean the sink hole
- Remove old putty and buildup. Clean the sink area before installing a new faucet.
If the U shaped bracket is corroded or the nuts won’t budge, heat the nut slightly with caution or use an impact driver for screws. Using the correct tool (basin wrench) makes a big difference when you learn how to remove kitchen faucet with U shaped bracket in cramped spaces.

Troubleshooting common problems when removing U shaped bracket
Here are problems I commonly see and quick fixes.
- Stuck or rusted nuts
- Apply penetrating oil, wait 10–15 minutes, and use a longer wrench for more leverage. If the nut strips, cut it off and replace.
- Limited space under the sink
- Use a basin wrench or swivel-head ratchet. Remove the P-trap if it blocks access.
- Sprayer hose stuck in the hole
- From above, push the hose back up while pulling the faucet from its hole. Use a helper if needed.
- Broken bracket or stripped fasteners
- Remove the bracket with pliers or cut it away carefully and replace mounting hardware with the new faucet kit parts.
Reinstalling or replacing after removal
If you removed the faucet to replace it, follow these brief steps to reinstall or upgrade.
- Check new faucet parts and compare with old mounting method.
- Apply plumber’s putty or gasket as recommended by the manufacturer.
- Feed hoses and shank through the sink hole from above.
- Reposition the new U shaped bracket or mounting plate under the sink.
- Tighten mounting nuts evenly so the faucet sits level.
- Reconnect supply lines, turn on water, and test for leaks.
When learning how to remove kitchen faucet with U shaped bracket, keep all old parts until the new faucet works. This saves time if you need to match pieces or troubleshoot.

Personal experience and practical tips
When I first started, I tried to work without a basin wrench and spent an hour fighting a nut. Invest in a basin wrench—it saves time and back pain. Another lesson: always have a spare supply line and a roll of plumber’s tape on hand; older lines often fail during removal. Label parts in a plastic bag as you remove them. A photo taken before disassembly can be a lifesaver when you go to reinstall.
Benefits and limitations of the U shaped bracket design
U shaped brackets offer sturdy support and even clamping force, making them reliable for heavy faucets. They are common on older and builder-grade sinks because they distribute pressure and reduce rocking. Limitations include harder access in tight cabinets and susceptibility to corrosion if exposed to moisture. Knowing how to remove kitchen faucet with U shaped bracket helps you decide whether to reuse the bracket or replace it with a modern mounting plate.
Frequently Asked Questions of How To Remove Kitchen Faucet With U Shaped Bracket
How long does it take to remove a faucet with a U shaped bracket?
Most DIYers can remove a faucet in 30–60 minutes. Stuck nuts or poor access can add time.
Do I need special tools to remove the U shaped bracket?
A basin wrench and adjustable wrench are usually enough, and penetrating oil helps with rusted fasteners.
Can I reuse a U shaped bracket when installing a new faucet?
Yes, if it is not corroded and matches the new faucet’s mounting system. Otherwise, replace it for a secure fit.
What if the mounting nuts are stripped or rusted?
Use penetrating oil, a socket cutter, or carefully cut off the nut and replace the fastener. Wear eye protection.
Should I shut off the main water supply before removal?
Shutting off the sink’s local shutoff valves is usually enough. Shut the main if local valves are absent or faulty.
Conclusion
Removing a kitchen faucet with a U shaped bracket is a manageable task when you have the right tools and steps. Follow safety tips, work methodically, and use a basin wrench for hard-to-reach nuts. If a repair turns into a replacement, keep old parts until the new faucet is fully tested. Try the steps on a weekend project, and share your results or questions below — I’ll help troubleshoot any sticking points.